A DataLayer is a JavaScript element that stores various information that can be transmitted to tools like Google Tag Manager.
It can include any type of data, here are some examples with their use cases
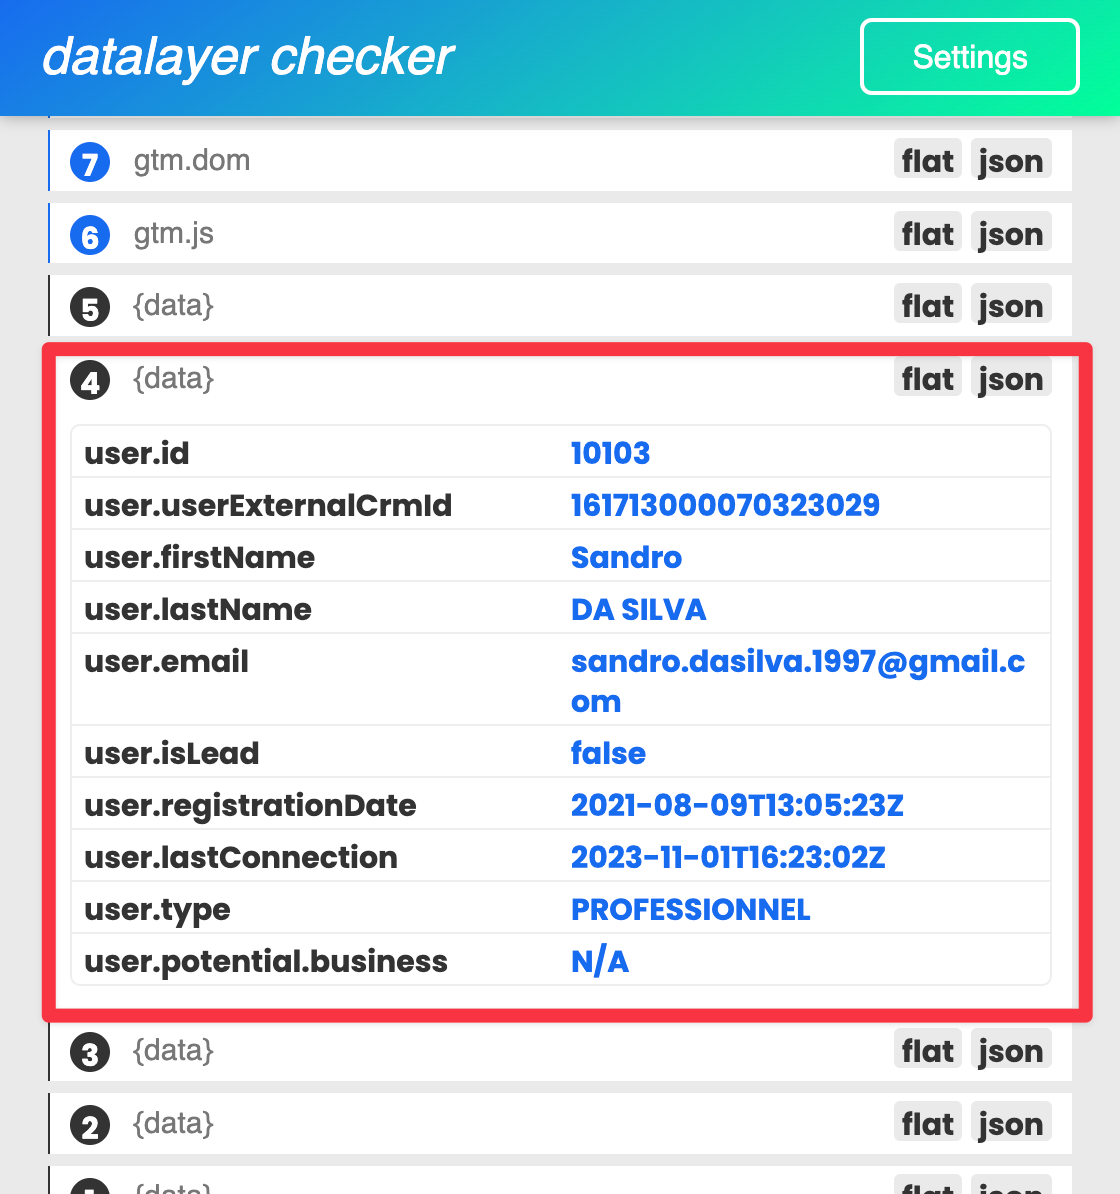
1. User identification data
Example: user ID, membership type (e.g. “premium member”).
Use cases: Content personalization, audience segmentation for remarketing.
2. E-commerce data
Example: product ID, product name, category, category, category, price, quantity, total cart value.
Use cases: Conversion tracking, product performance analysis, advertising campaign optimization.
3. Interactions and events:
Example: Clicks on specific buttons, completion of a form, time spent on a video.
Use cases: Analysis of user behavior, optimization of the user experience.
4. Information about the session:
Example: Traffic source (organic, paid, referral), device type (mobile, desktop), screen resolution.
Use cases: Analysis of traffic sources, optimization of design according to devices.
While this information varies, it follows a distinct structure.
In the DataLayer, each piece of information is represented by a duo:
a name associated with its value.
Example:
“Site_currency” could have the value “EUR”
“Product_brand” could be associated with “Nike”
It's clear, isn't it?
We have several uses of DataLayer at Tracktor.
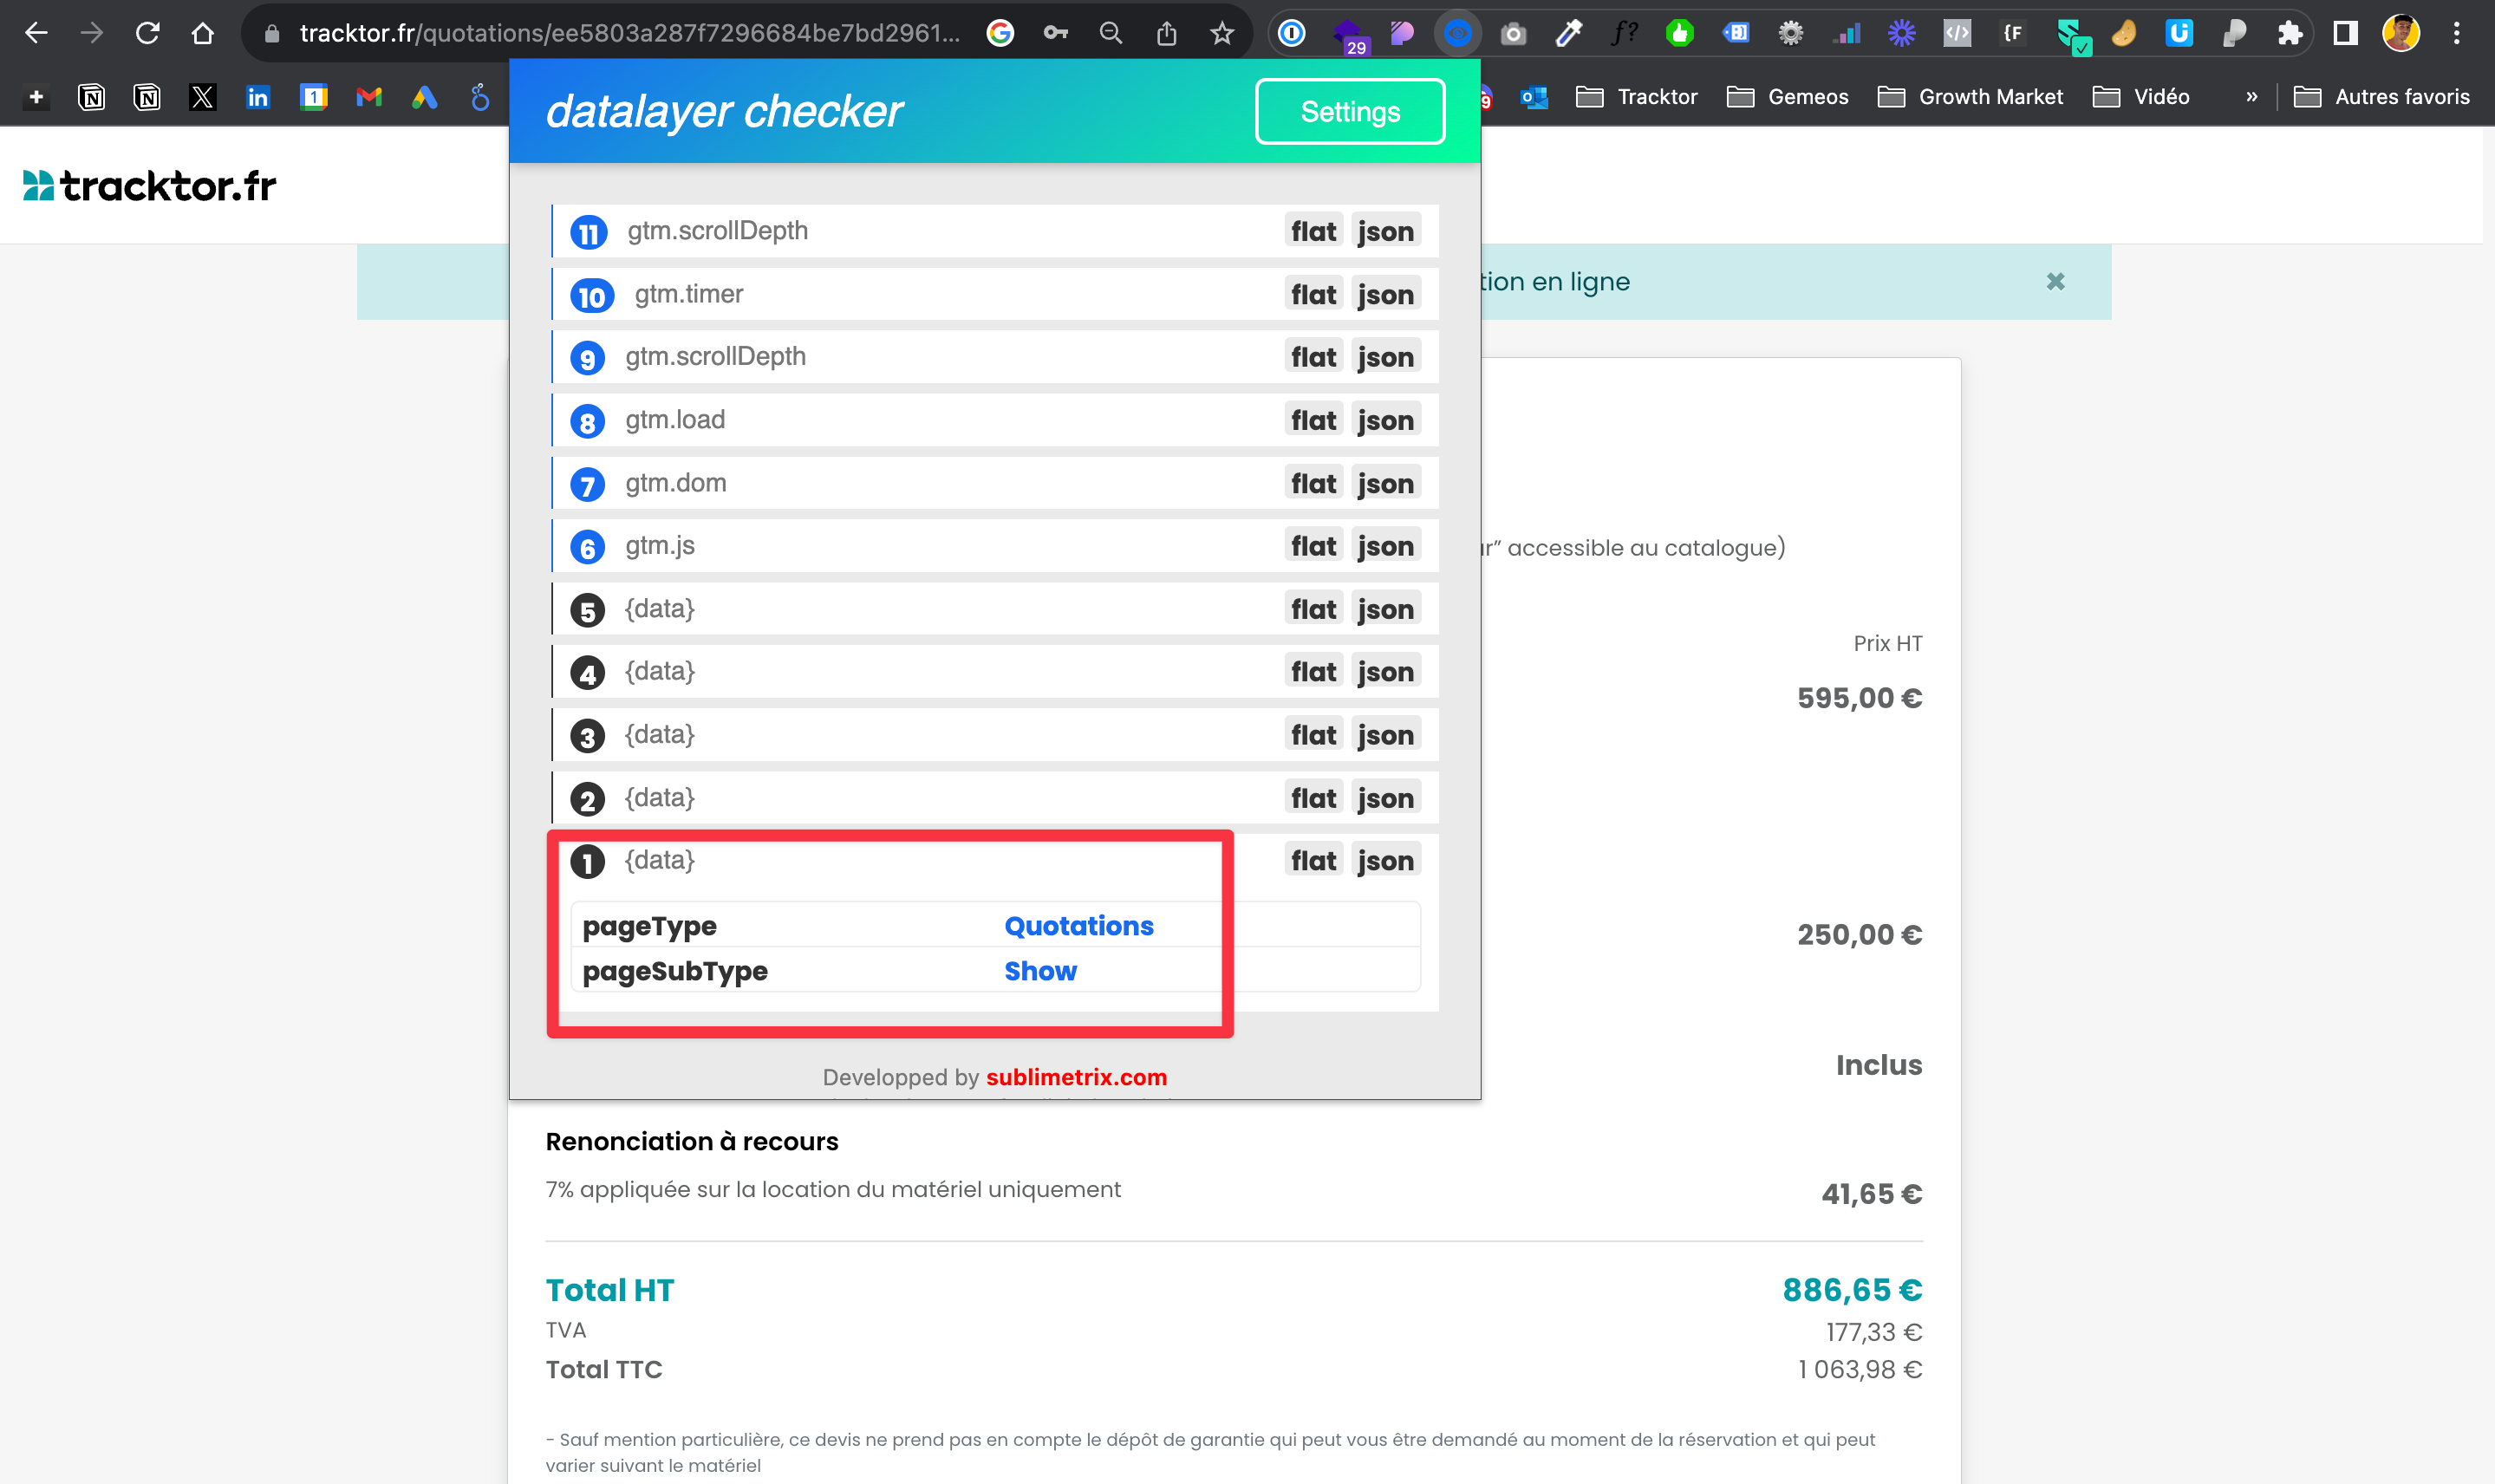
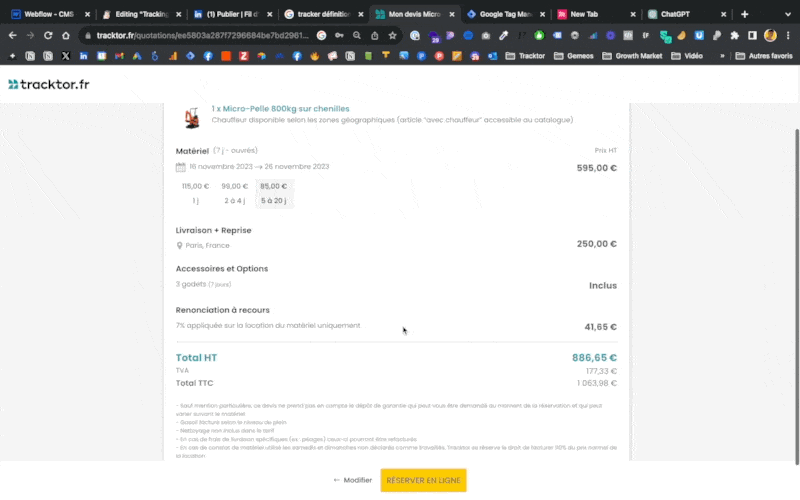
We measure a conversion (quote generation), when the person arrives on the page with:
By doing this, we can easily set up the conversion goals in GTM for example (cf screen)

Examples:
1 - The product - Super useful for example for doing analyses at the product level in GA, Looker, etc.
2 - The amount of the quote excluding taxes - Op a variable to use as a value in your conversions for your Ads and manage with ROAS 😎


The best way to adapt the customer experience according to their typology
Before implementing a DataLayer, determine what data you want to track.
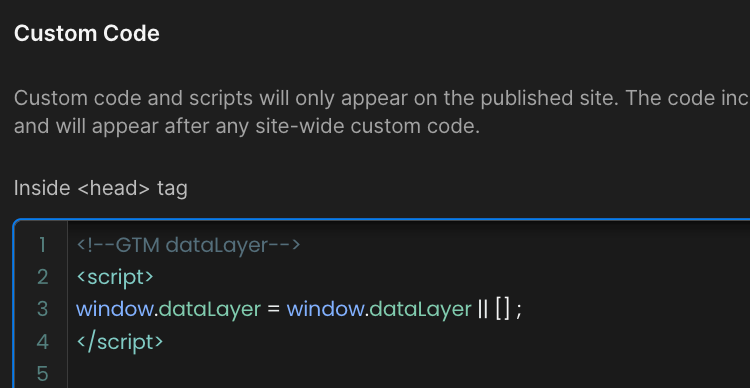
Place the following code above your Google Tag Manager (GTM) code in the <head>of each page of your site:
When a specific event occurs on your site, you can “push” information into the DataLayer.
For example, let's take the conversion action (quote generation) currently presented equal to:
The code to be added will be as follows:
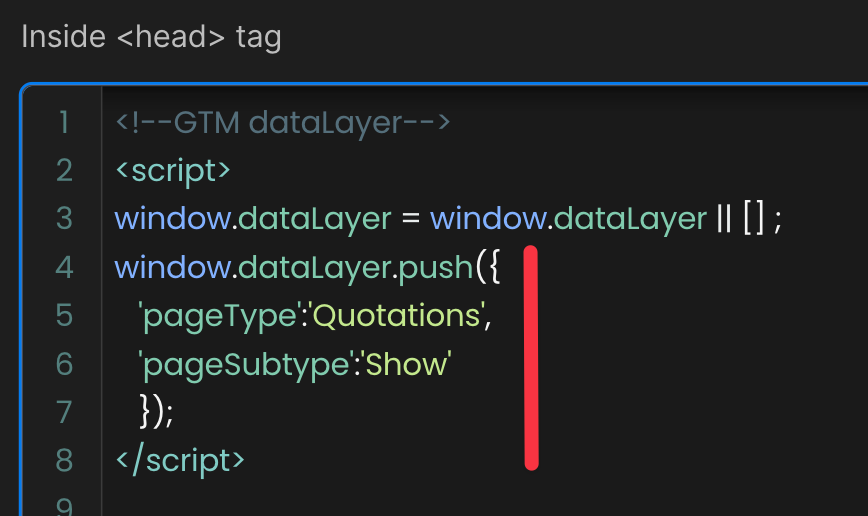
You can add as many rows as you want under PageSubtype if you want to upload more data.
Use the extension DataLayer checker to test your integration (the tool I use in my screens above)
Example: Upload product information
I use the variables present in my CMS to bring up the information according to the product page (see screen)


Once you start pushing data into the DataLayer, you can use it in GTM.

As you can see, DataLayer is a powerful tool that allows you to effectively integrate and manage dynamic data on your website, in particular in conjunction with Google Tag Manager.
Its implementation allows greater flexibility and adaptability in monitoring user interactions and information without having to constantly modify the site's source code.
To fully exploit its advantages, it is essential to plan its implementation well, to add relevant data and to regularly test its configuration to ensure the accuracy of monitoring.
In short, DataLayer is a crucial step for advanced analysis and optimization of the user experience on your website.